Showing posts with label recipes. Show all posts

Thursday, March 14, 2013

Amish Friendship Bread Recipe

One of my sweet friends gave me an Amish Friendship Bread starter. I'm going to change the name to Amish Friendship Prayer Bread because everyday when I mix the dough I say a prayer for my friend and her family. One purpose of friendship bread I think is to share delicious homemade bread with others. It takes 10 days from the day you get the starter until you can bake it. From each starter you make 4 new starters, one to keep and 3 to give away. The bread is delicious and of course Blue Rock loved helping mix it! If you want me to share a starter with you, let me know. Here is the recipe my friend gave me with the starter bag. 

Amish Friendship Bread
Do not use a metal spoon or bowl for mixing.
Do not refrigerate.
It is normal for the batter to thicken, bubble and ferment.
Day 1 – This is the day you get the batter, so do nothing.

Day 2 - Squeeze the bag.

Day 3 - Squeeze the bag.

Day 4 - Squeeze the bag.

Day 5 - Squeeze the bag.

Day 6 - Add the 1 cup flour, 1 cup sugar and 1 cup milk to the bag. Squeeze until well mixed.

Day 7 - Squeeze the bag

Day 8 - Squeeze the bag

Day 9 - Squeeze the bag

Day 10 – In a large bowl, combine the contents of the bag, and 1 cup of sugar, 1 cup of flour, and 1 cup of milk. Stir with wooden spoon. Scoop out four (4) 1-cup starters into separate ziplock bags. Keep one starter for yourself and give the other 3 to friends with a copy of the instructions. To the remaining batter in the bowl, add the following:
2 cups flour
1 cup sugar
½ t. baking soda
1 ½ t. baking powder
2 t. cinnamon
½ t. salt
1 box instant vanilla pudding
3 eggs
1 cup milk
1 cup oil
1 t. vanilla
Nuts and raisins (optional) 

Mix well. Pour into a well-greased and sugared pan (bundt pan or 2 regular size loaf pans). Sprinkle a little cinnamon sugar on top. Bake at 350 degrees for 45-50 minutes. Cool 10 minutes and remove from pan.
Be creative! Make a new recipe from every starter. Here are 2 ideas:
Lemon Poppy Seed – substitute lemon flavoring for vanilla, 2 T. poppy seeds for cinnamon, lemon pudding for vanilla, and leave out the nuts and raisins.

Chocolate Chip – substitute almond flavoring for vanilla, cocoa for cinnamon, chocolate pudding for vanilla pudding, and mini chocolate chips for nuts and raisins. 
 
Baking is so much fun!


Sunday, January 6, 2013

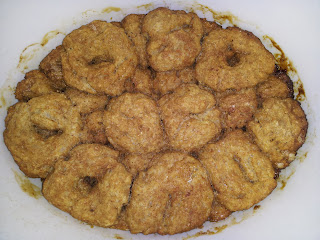
Slow Cooked Whole Wheat Cinnamon Donuts

Slow Cooked Cinnamon Balls
My family loves donuts but rarely eats them.  I was excited when I saw this recipe.  A few weeks ago I signed up for Grocery Shrink and for the past two weeks have enjoyed lots of yummy recipes.  I made these last night and we ate them this morning.  They were so delicious and super easy to make!  I prepared the dough last night and put it in the crock pot.  This morning when we woke up they were ready.  Thanks Grocery Shrink for another delicious meal!

Ingredients for 4-6 people:

Dough: 

1/2 plus 1/3 cup warm water
2 tsp oil
1 Tbs honey
1/2 tsp salt, 2 cups flour (whole wheat, unbleached or a combo - I did a combo)
2 tsp yeast

Other ingredients:

1/4 cup brown sugar
1/2 tsp cinnamon
2 Tbs butter, melted

Icing:

2/3 cup powdered sugar
1 Tbs milk


Directions:

I put everything in my Breville Mixer with the dough hook and mixed until doughy. Or you can mix the dough in your bread machine.  I pulled apart the bread dough into 1 inch pieces, rolled into balls or made little donuts.  If you don't want to make the dough you could use store bought bread dough.  However, this dough was so delicious and easy to make, I'd suggest trying it.

Combine cinnamon and brown sugar in a shallow bowl. Roll each ball into melted butter and then in sugar mixture. Place in greased slow cooker. Place a paper towel under the lid to collect condensation. Cook on low for 3 hours. Or you can put these on a baking sheet and bake at 350 for 45 minutes or until you start to smell them cooking.

Before serving.  Mix powdered sugar and milk (2/3 cup powdered sugar, 1 Tbs milk), drizzle over top of cooked rolls.

I put everything in the crock pot last night, plugged my crock pot into my automatic light timer and let it cook while we were sleeping. My husband and I both woke up before 5am last night anyway and we checked on it to make sure it was working. They were very good and a lot healthier than donuts. Took care of our donut craving!

Before I cooked them


This morning, all done!!

Monday, November 12, 2012

Whole Wheat Chocolate Chip Cookie Recipe and Video

The night I bought my new Breville Stand Mixer, I made some whole wheat chocolate chip cookies with Blue Rock.  I wanted to see how easy it was to make them.  I had never used my mixer before so I was learning as I was going.  The mixer was great!  It was easy to use and handled the mixing very well, even when Blue Rock turned it to the highest speed.  You can see how well it worked below and how quiet the Breville Stand Mixer is.


This is the Betty Crocker Recipe.

Whole Wheat Chocolate Chip Cookie Recipe

Ingredients

3/4 cup granulated sugar
3/4 cup packed brown sugar
1 cup butter or margarine, softened
1 teaspoon vanilla
1 egg
2 cups whole wheat flour
1 teaspoon baking soda
1/2 teaspoon salt
1 package (12 ounces) semisweet chocolate chips (2 cups)
Directions
  • 1 Heat oven to 375ºF.
  • 2 Mix sugars, butter, vanilla and egg in large bowl. Stir in flour, baking soda and salt (dough will be stiff). Stir in chocolate chips. Drop dough by rounded tablespoonfuls about 2 inches apart onto ungreased cookie sheet.
  • 3 Bake 8 to 10 minutes or until light brown (centers will be soft). Cool slightly; remove from cookie sheet. Cool on wire rack.

My New Mixer!

I bought my first awesome stand mixer!  Well, my husband bought it for me for an early Christmas present! Like I said in a previous post, I had a cheap stand mixer in Germany but it was not very good.  I know it would never have been able to mix dough, for example.  After lots and lots of research I decided to buy the Breville Scraper Mixer Pro 5-Quart Die-Cast Stand Mixer.  This was a difficult choice.  I had always thought I would eventually buy a KitchenAid Mixer.  However, after looking at them both, reading lots of reviews, and plugging them both in at the store and comparing them side-by-side, I decided I liked the Breville better.  It was quite a bit quieter than the KitchenAids, had a higher watt motor than the KitchenAid Artizan and only slightly less than the Professional, and the speed dial was easier to use.  It also has a timer and you can set it to a certain time and it will automatically turn off.  I love that!  Especially since I have a busy boy running around and can easily lose track of time.  Both mixers were the same price so it boiled down to what I thought I would enjoy using the most.  I also liked the fact that the controls tells you what speed to set for different things.  Again, it was a tough decision as both mixers are great.  The only thing my Breville won't do that a KA will is I can't attach things to it like a meat grinder.  However, the primary purpose of my mixer is for baking and using it as a mixer.  The makers of it say it was designed by bakers for bakers.  It's a solid mixing machine!

I bought my Breville Stand Mixer from Bed, Bath, and Beyond for $299.99.  However, I had a 20% coupon so it brought my total before tax to about $240.  So for a little over $260 (after tax), I have an amazing mixer.  Here's a video of my unboxing.


Tuesday, November 6, 2012

Kitchen Stand Mixer Advice


In Germany I bought my first stand mixer.  It was an inexpensive German brand 220v.  I got a lot of great use out of it and had no problem selling it before we moved back.  Now I am looking for a really good stand mixer that will hopefully last for a number of years for my life in the States.  I had always thought I would get a KitchenAid stand mixer.  However, it seems like since KitchenAid is no longer owned by Hobart, the quality is not what it used to be.  Lots of people love them but then there's a certain percent that get a bad one.  Although it is noteworthy that for many years, KitchenAid was voted No. 1 by Consumer Reports, even though it's no longer what it used to be.  However, recently, Consumer Reports has rated another kitchen stand mixer No. 1, Breville, which looks really awesome.  Another friend told me Bosch is the best brand.  However, based on reviews, their larger kitchen mixer doesn't seem like it's as good for smaller batches.  If you have a large family and bake large amounts at a time it would be perfect.  Bosch does, however, have a compact mixer that could work for us.  It reminds me of my German mixer except my German mixer didn't have a shield to keep the batter inside. 

I would love to get your opinion on this.  If you own or have used one of these, did you like it?  I mainly bake cookies, brownies, and occasionally bread. If there's another mixer you love, I'd love to learn about it.

Here are the mixers I'm considering:

1. Breville Scraper Mixer Pro - $285.53 at Amazon.  It has 550 watts, 5 qt. stainless steal bowl, 12 speeds, and a timer.  It actually looks like an awesome mixer.  I just had never heard of it before.  The only downside is you can't add attachments like you can on KitchenAid.  But I'm not sure if I would even buy or use any attachments, so this might work fine.  I'm actually leaning toward getting this one because of all the user friendly baker features.  Including high watts and timer.

Breville Mixer
2. KitchenAid Artisan or KitchenAid Professional - $359-$459.
KitchenAid Artisan has 325 watts, 5 qt. bowl, and 10 speeds. Lots of colors to choose from.
KitchenAid Professional 600 series has 575 watts, 6 qt. bowl, and 10 speeds.
Both are made in the USA.

KitchenAid® Professional 600™ Series 6-Quart Bowl Lift Stand Mixer
KitchenAid Professional

KitchenAid® 5-Quart Artisan™ Stand Mixer
KitchenAid Artisan


3. Bosch Compact Mixer - $199.99 at Amazon.  The pros is it's less expensive than the other two and can do basically what the other ones can do and is smaller.  It has 400 watts and has great reviews for making bread.
Negatives are, it's made of all plastic, although this makes it lightweight.  It also only has four speeds.
I just don't know if this one is really as good as the others.  Consumer Reports didn't even consider this one in it's study. I also don't really like the color white but I would probably store it in my cabinets anyway.
product image
Bosch Compact Mixer


Monday, October 29, 2012

Healthy Halloween Party Foods

Even though Halloween is not one of my favorite holidays, I enjoy the parties and seeing people (especially kids) dressed up.  We have been enjoying several Halloween parties this year and I'm constantly thinking of healthy and gluten-free foods to take that actually taste good and kids will eat.  This year I found three and added a little Halloween creepiness to some of them. 

I made two appetizers, one fruit and one vegetable.  I also made a dessert.  Here are my gluten-free Halloween party foods.  The great thing about these are you can make these foods for any party, just take away some of the extra creepiness.  Click on the links below for the recipes!  Happy Halloween!!

Spooky Apple Teeth


Creepy Spinach and Artichoke Finger Dip 

Primal Pumpkin Almond Butter Brownies


Spooky Apple Teeth

Spooky Apple Teeth
I think I got this idea from Pintrest.  I'm always thinking of healthy things to take to parties. I made these for a Halloween party and the kids loved them. These are easy to make.  

I used organic apples, organic apple butter, and different nuts for the teeth.  I used almonds, walnuts, and pistachios.  Pistachios seemed to be the easiest.  You could also use almond butter or peanut butter for the filling.

Here's my step-by-step guide to making these yummy and healthy treats.

Start by cutting the apples like this.


Then cut the mouth.


Once you have them all cut, rub a sliced lemon over the whole apple so it doesn't darken.


Spread some apple button in the "mouth" of the apples.


Add the nuts for the teeth and you're done!


Creepy Spinach and Artichoke Finger Dip

Creepy Spinach and Artichoke Finger Dip
I made this delicious dip for a Halloween party.  This is the Vitamix's Spinach and Artichoke Dip and came from here. As I was trying to think of ways to make it creepier I added some sliced carrots with almond slivers on top for finger nails.  This dip is yummy!  I plan on making this again for Christmas but without the fingers.

If you don't have a Vitamix, just use your blender or food processor.  Blend the first step tell pretty smooth and then pulse the second step.

Spinach and Artichoke Dip

Ingredients
  • 1/2 cup (120 g) light mayonnaise
  • 1/2 cup (120 g) light sour cream
  • 1 slice lemon, peeled, seeded
  • 1 (10-ounce) package of frozen spinach, thawed, drained
  • 1/8 teaspoon salt
  • 1/8 teaspoon ground black pepper
  • 1 garlic clove, peeled
  • 1/4 cup (25 g) grated Parmesan cheese
  • 1/2 cup (85 g) artichokes, canned and drained or frozen and thawed
Directions
  1. Preheat oven to 350˚F (180˚C).
  2. Place all ingredients, except artichoke hearts, into the Vitamix container in the order listed and secure lid.
  3. Select Variable 1.
  4. Turn machine on and slowly increase speed to Variable 4.
  5. Blend for 15 seconds. Remove the lid plug.
  6. Add artichokes through the lid plug opening.
  7. Blend for an additional 5 seconds.
  8. Pour into an oven-safe dish and bake uncovered for 20-25 minutes or until bubbly. Serve with crackers, pita bread, veggies, or pumpernickel bread.

Primal Pumpkin Almond Butter Brownies

Pumpkin Almond Butter Brownies
These are really good!  I got this recipe from This Primal Life. I made these for a Halloween party and when Blue Rock asked for dessert I gave him one of these brownies. They are really prefect for any party and are a nice healthier alternative to some of the real sugary desserts.  They are also gluten free! 

Primal Pumpkin Almond Butter Brownies

 
Ingredients:
1 cup almond butter
¾ cup mashed pumpkin or other squash, canned or steamed
1 egg
1/3 cup honey
1 tsp baking soda
Combine all of the ingredients in a bowl. Mix well. Pour into a greased 8 x 8 in pan. Bake at 350 degrees for 25 minutes or until a toothpick inserted comes out clean. Serves 8. You can add chocolate if you want. I did to the top of half the batch and those were even better! The consistency was really good. If you want to use less honey I read you can use as little as 2 Tbs. I just estimated 1/3 cup and poured it in.

Thursday, October 25, 2012

Green Cauliflower Macaroni and Cheese

Green Cauliflower Macaroni and Cheese
In my quest for eating more real foods, I've been trying to think of recipes that are colorful, tasty, interesting looking, and healthy.  Since it's almost Halloween, I decided to make something would interest my 3-year old.  My family does not eat a lot of cauliflower nor do we eat a lot of Marconi and Cheese.  In fact, Blue Rock does not like the typical Macaroni and Cheese dinners from a box.  But I thought, maybe if I'm creative, he'll eat my green Cauliflower Macaroni and Cheese.  I first got the idea from Healthy Recipes From the White House to You by Michelle Obama.  However, I changed her cauliflower macaroni and cheese quite a bit.  For example,my green macaroni and cheese does not use milk and has kale and walnuts, and most importantly is green!  This is a great vegetarian recipe.  My family loved it and I hope yours does too!

Green Macaroni and Cheese 

Ingredients
8oz-10oz whole grain pasta (if gluten free use rice pasta)
1/2 cups walnuts (divide into 1/4 cups each)
2.5 cups shredded cheddar cheese, I did a mixture of sharp and mild (or a mixture of your favorite melting cheeses), divided, save 1/2 cup of cheese for the top
1 small head of cauliflower, cut into florets
1 cup fresh kale
Salt and pepper to taste
1 tablespoon melted butter
1/2 cup breadcrumbs (I made mine with one piece of toasted whole grain bread and 1/4 cup walnuts in a food processor). If avoiding gluten, use gluten free crackers instead of bread.

Directions
  1. Preheat the oven to 350º. Bring water to a boil and cook the pasta until al dente, drain.
  2. Steam the cauliflower until soft, about 10 minutes. Transfer to a blender along with a few tablespoons of the steaming liquid. Add kale.  Puree the cauliflower and kale until smooth.  Add butter and blend.
  3. Add 1 cup of water and 1/4 cup of walnuts to the blender and blend with the cauliflower and kale puree.
  4. In a medium size casserole dish, combine the pasta and hot cauliflower puree. Add the puree mixture and cheeses. Season with salt and pepper to taste.
  5. In a food processor, add 1/4 cup of walnuts.  Pulse until fine.  If making your own breadcrumbs, add to the food processor.  If not, mix the walnuts and breadcrumbs, should look kind of like sand. Sprinkle across the top of the pasta mixture.  Top with about 1/2 cup of cheese. Place the dish in the oven for 10-15 minutes until the top is crispy and the sauce is bubbling.
Serves 4 to 6.

Yum, looks like slime

Grated cheese, sharp and mild cheddar cheese

Mixed the cheese sauce with the pasta

Top with walnut breadcrumbs

Add a some mild cheddar cheese on top

It's done!

Time to eat!


Sunday, September 30, 2012

Freezer Burritos

15 Burritos Ready to Freeze
For the past 7 years or so my husband has wanted me to make and freeze breakfast burritos.  When we were in Germany our freezer was too small to make and freeze anything.  Now that we're back in the States we have a little more freezer space.  

These sausage and egg burritos were easy to make.  I plan on making them again.  My husband raved over them and has become one happy man in the morning.  He can now take a few frozen burritos with him to the office and is satisfied until lunch time.

Freezer Sausage, Egg, and Cheese Burritos

Ingredients

1 lb. ground sausage (if possible, use organic)
12 organic eggs (you don't have to use organic but I highly recommend it, even if you don't use organic sausage or cheese)
12-15 tortillas (I used 15 whole grain and multi grain tortillas)
1 cup of shredded cheddar cheese
salt and pepper to taste
foil for wrapping the burritos
2 large gallon freezer bags to put them in

Directions

Cook sausage until no longer pink.  Drain and put in another dish.  In the same pan you cooked your sauce scramble and cook eggs, add salt and pepper to taste.  Place eggs in a different dish.

Place one tortilla on about 12 inches of foil.  Scoop some egg, sausage, and top with cheese.  Wrap stuffed tortilla into a burrito and wrap the foil around.  Repeat until you have used all of the sausage, eggs, and cheese.  I made 15 burritos.  Place wrapped burritos into large gallon freezer bags.  

To eat: Unwrap burrito from foil, place on a microwave safe plate and heat for 90 seconds.  If burrito is not cooked all the way, add 30 seconds at a time until heated through.  Enjoy!

Get all your ingredients ready

Fill tortillas

Wrap tortilla into a burrito

Wrap foil around burrito

Place in freezer bags, label, and freeze

Blueberry Pie Recipe

Organic Blueberry Pie
Now that Autumn is upon us, I have been in the mood to bake.  I love Blueberries and have always wanted to try Blueberry Pie.  Given the health benefits of blueberries, I figured a blueberry pie would be healthier than say a chocolate pie...just don't talk about the sugar in it.  Anyway, I have to say that Blueberry Pie is delicious!  Another benefit to making pie yourself is you know exactly what is in the pie and you can use all organic ingredients if you want.

I got this recipe from the book Don't Panic Dinner's in the Freezer.  The beauty of this pie recipe is you can freeze it, if you want.  I, however, wanted to make and eat it right away.  The the book the pie recipe is called Mom's Blueberry Pie.  I made my own pie crust and even though this pie recipe does not call for a crust on top of the pie, I went ahead and sprinkled the other pie shell on top of the pie because my husband loves pie crust.  So you can make it with or without a top pie shell.  Here's my pie crust recipe.  If you prefer to do the top layer the traditional way then roll the pie crust and cut in strips.  I found sprinkling the pie crust on top achieves the same purpose and saves time.

Mom's Blueberry Pie

4 cups blueberries (I used organic frozen blueberries that I bought at Costco)
2 heaping Tablespoons of flour
1 cup sugar (I used about 3/4 cup)
1 Tablespoon butter
3/4 teaspoon lemon juice (I didn't have any lemons so I left this out and it turned out great)

Directions

Rinse berries in colander.  Place berries in saucepan with flour, sugar, butter, and lemon juice, and bring just to boiling point.  Pour in unbaked pie shell.  If you want to freeze it, use foil and plastic wrap to freeze.

If cooking day of, preheat oven to 350 degrees.  Bake 40-50 minutes or until filling bubbles.

If baking from frozen state, preheat oven to 375 degrees and bake 40-50 minutes.

Hint: If pie crust is getting too brown before filling is done, cover lightly with foil and continue baking.

Make your pie crust first

Heat and stir the filling

If you don't want a top crust, bake or freeze just like this

If you want a top crust, add it here

Yummy Blueberry Pie!

Quick and Easy Pie Crust Recipe

Tasty Pie Crust
I finally made my own pie crust and I have to say it was a lot easier than I thought it would be.  Not to mention the taste was 10 times better than the frozen pie shells I usually use.  This took me only about 5 minutes to make and I knew exactly what was in my pie shell. 

Many pie crust recipes use lard, some oil, but I wanted one with butter.  I don't have any lard and didn't want to go to the store for one thing.  I found a recipe that uses butter here.  I used unsalted Simple Truth Organic butter that I bought at Kroger's.  Although the original recipe calls for Land O' Lakes butter, I don't think it really matters what kind of butter you use.

Butter Pie Crust Recipe

2 cups all-purpose flour
1/4 teaspoon salt
2/3 cup cold 
4 to 5 tablespoons cold water
 
Directions

Combine flour and salt in large bowl; cut in butter with pastry blender or fork until mixture resembles coarse crumbs. I used a knife and flaked it off the stick.  Stir in enough water with fork just until flour is moistened.

Divide dough in half; shape each half into ball. Flatten slightly. Wrap 1 ball in plastic food wrap; refrigerate.

For 1-crust pie, roll out 1 ball of dough on lightly floured surface into 12-inch circle. Fold into quarters. Place dough into 9-inch pie pan; unfold dough, pressing firmly against bottom and sides. Trim crust to 1/2 inch from edge of pan. Crimp or flute edge. Fill and bake according to pie recipe directions.

For 2-crust pie, roll out remaining ball of dough on lightly floured surface into 12-inch circle. Fold dough into quarters. Place dough over filling; unfold. Trim, seal and crimp or flute edge. Cut 5 or 6 large slits in crust. Bake according to pie recipe directions.

For baked unfilled pie shell, prepare dough as directed above for 1-crust pie. Prick crust all over with fork before baking. Bake at 475°F. for 8 to 10 minutes or until lightly browned. 
 
*Rolling the dough Tip
Place dough between two pieces of wax paper.  Roll dough with rolling pin over the wax paper.  This made rolling and clean up so much easier.

Thursday, September 27, 2012

Classic American Goulash

My sister shared this recipe with me.  It was delicious!  She got this recipe from allrecipes.com. This is not a Hungarian Goulash but the typical American Goulash.  I followed the slow cooker directions and it turned out great.  If you cook with organic ingredients, this is an inexpensive organic recipe compared to some.  I buy my organic ground beef at Costco and you can get organic canned tomatoes and tomato sauce for not too much more at most grocery stores and Target sells a number of organic spices.

Classic Goulash Recipe

Ingredients
  • 1 pound lean ground beef
  • 1 large yellow onions, chopped
  • 1-1/2 cloves garlic, chopped
  • 1-1/2 cups water
  • 1 (15 ounce) can tomato sauce
  • 1 (14.5 ounce) can diced tomatoes
  • 1 tablespoon and 1-1/2 teaspoons soy sauce
  • 1 tablespoon dried Italian herb seasoning
  • 1-1/2 bay leaves
  • 1-1/2 teaspoons salt, or to taste
  • 1 cup uncooked elbow macaroni
  1. In a large Dutch oven, brown the ground beef over medium-high heat, breaking the meat up as it cooks, until the meat is no longer pink, about 10 minutes. Drain excess fat, and stir in the onions and garlic. Cook and stir the meat mixture until the onions are translucent, about 10 more minutes.
  2. Stir in water, tomato sauce, diced tomatoes, soy sauce, Italian seasoning, bay leaves, and salt.  Bring the mixture to a boil over medium heat. Reduce the heat to low, cover, and simmer 20 minutes, stirring occasionally.
  3. Stir in the macaroni, cover, and simmer over low heat until the pasta is tender, about 25 minutes, stirring occasionally. Remove from heat, discard bay leaves, and serve.
** For slow cooker, preheat a slow cooker to High heat. Make recipe through Step 1; place the ground beef-onion mixture into the preheated slow cooker. Stir in water, tomato sauce, diced tomatoes, soy sauce, Italian seasoning, bay leaves, seasoned salt, and macaroni until thoroughly combined. Cook on High for 1 hour.


Sunday, September 16, 2012

Gluten Free Mini Apple Crisps with Hemp Hearts

Mini Apple Crisps with Hemp Hearts
We're trying to eat less gluten.  There are several studies done regarding auto-immune disorders and the benefits of eliminating gluten.  However, I love fruit crisps and most include flour.  Since fall is approaching, baking season has started.  I made these in individual ramekins.  See guideline below for serving sizes.  Here is my flour-free Mini Apple Crisps.  They are reasonably healthy thanks to the oats, hemp hearts, and apples.  My 3-year old loved it!

Gluten Free Mini Apple Crisps

Pre-heat the oven to 350 degrees.

Servings
1
2
4
Apples, peeled
½ apple
1 apple
2 apples
Splenda or sugar (I used Splenda)
¼ tsp sweetener
½ tsp sweetener
1 tsp sweetener
Melted Butter
1 Tbs
2 Tbs
4 Tbs
Raw Hemp Hearts (or you can used chopped Walnuts)
1 Tbs
2 Tbs
4 Tbs
Brown Sugar
½ Tbs
1 Tbs
2 Tbs
Rolled Oats (gluten free if you’re avoiding gluten)
1 Tbs
2 Tbs
4 Tbs


In a small bowl, mix the apples and Splenda (or sugar).  Scoop apples in individual 6oz. ramekins.  In the same bowl you had the apples in, mix together the oats, melted butter, brown sugar, and hemp hearts.  Spread evenly over the apples in the ramekins.  Place ramekins on cookie sheet and bake for 8-10 minutes.  Serve with ice cream. 


Related Posts Plugin for WordPress, Blogger...